I got handed down some Neo Wi-Fi alarms, could have set these up with Tuya app but a local setup is much better. After opening the alarm out it was clear that they use an Espressif Systems micro-controller.
Some searches yielded that these were Tasmotized but it seemed much better to use ESPHome to be used with Home Assistant
⚠️ Disclaimer
This guide is for educational purposes only. By proceeding, you acknowledge that jailbreaking or modifying your IoT device may void its warranty, violate the manufacturer's terms of service, and potentially expose it to security vulnerabilities. This process carries the risk of permanently damaging or "bricking" your device. You assume full responsibility for any outcomes. Always ensure your actions comply with local laws and regulations.Pre-requisites
- USB to TTL Convertor with 3.3v regulator (CH340 Based)
- Solid core wire (any way to make connections to the pads will do).
- Soldering supplies.
- Computer with WebSerial supported web browser (Tested on Google Chrome)
- ESPHome installation.
- Device with Wi-Fi.
Part 1 - Flashing
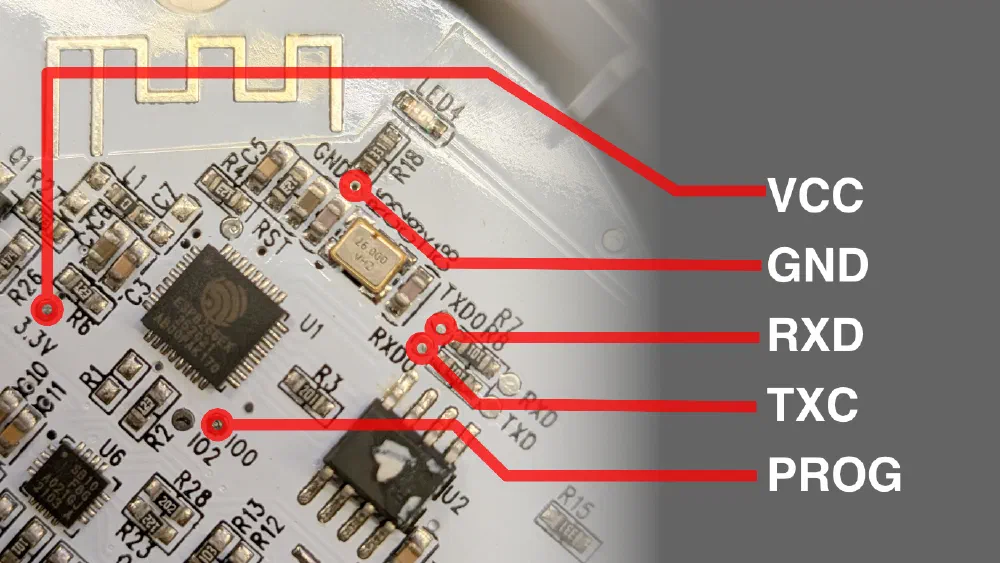
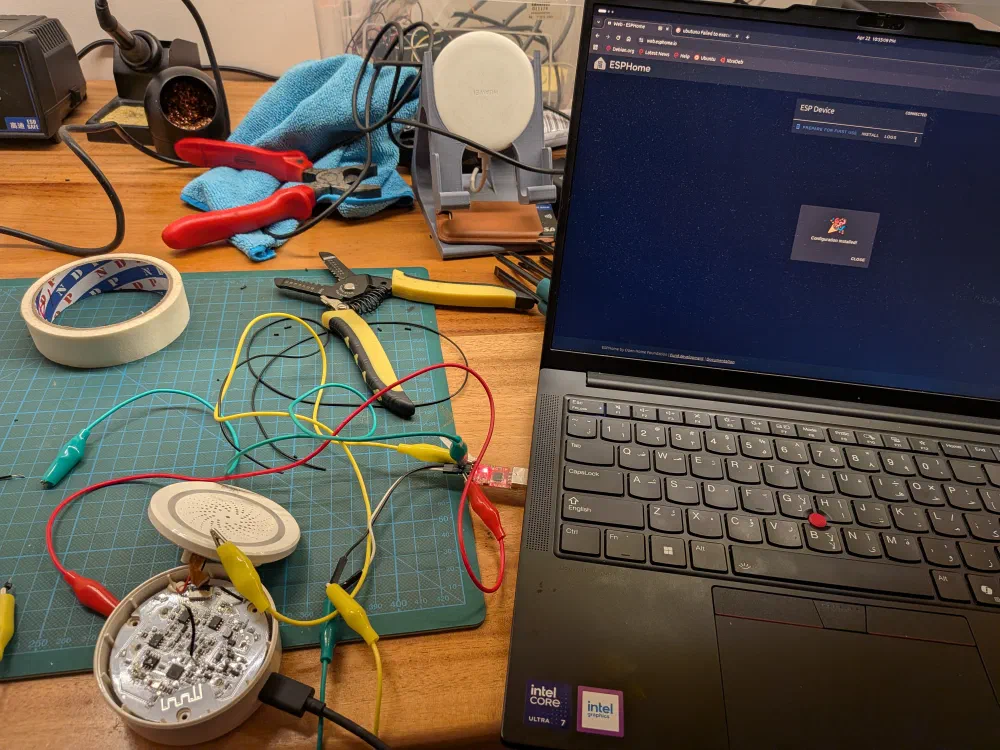
First take apart the device, being careful not to damage the flex cable, and identify the pads for the programming.
Do not plug in the device USB cable until specified.
- Solder short lengths of solid core wires to all illustrated pads.
- While the USB TTL convertor is unplugged wire the pads to the shown pins. (
PROGcomes for next step) - Connect the
PROGwire toGNDand plug in the USB to your computer, disconnectPROGafter USB is plugged in (PROG/GPIO0pulled down gets the micro controller to go into programming mode) - Go to ESPHome Web Flasher and follow the steps to flash the initial image.
- Disconnect USB TTL convertor and plug in the device USB cable and power it on. You can verify if the flashing worked by checking if you see a new
esphomeaccess point.
Part 2 - Programming
Now let’s provision the device and get it connect to Home Assistant.
- Connect to the
esphomeaccess point and get it connected to your home network. - Use the template.yml or content given below to program the device 1.
- Connect device to Home Assistant.

Expand for YAML Template
substitutions:
  name: neo-siren
  friendly_name: Neo Siren

esphome:
  name: ${name}
  friendly_name: ${friendly_name}

esp8266:
  board: esp01_1m

logger:
  baud_rate: 0

api:
  encryption:
    key: !secret api_key

ota:
  - platform: esphome
    password: !secret ota_password

wifi:
  ssid: !secret wifi_ssid
  password: !secret wifi_password
  ap:
    ssid: "${friendly_name} Fallback"
    password: !secret wifi_password

captive_portal:

uart:
  tx_pin: GPIO1
  rx_pin: GPIO3
  baud_rate: 9600

tuya:

switch:
  - platform: tuya
    name: "Alarm"
    switch_datapoint: 104
    icon: "mdi:alarm-bell"

  - platform: tuya
    name: "Temperature Alarm"
    switch_datapoint: 113
    icon: "mdi:thermometer-alert"

  - platform: tuya
    name: "Humidity Alarm"
    switch_datapoint: 114
    icon: "mdi:water-percent-alert"

select:
  - platform: tuya
    name: "Alarm Sound"
    enum_datapoint: 102
    icon: "mdi:music-note"
    options:
      0: Doorbell
      1: Fur Elise
      2: Big Ben
      3: Ring Ring
      4: Lone Ranger
      5: Turkish March
      6: High Pitch Siren
      7: Red Alert
      8: Cricket
      9: Beep Beep
      10: Dogs
      11: Police
      12: Chime
      13: Phone Ring
      14: Firetruck
      15: Clock Chime
      16: Alarm Clock
      17: Psycho

number:
  - platform: tuya
    name: "Alarm Duration"
    number_datapoint: 103
    icon: "mdi:timer"
    min_value: 1
    max_value: 1800
    step: 1

  - platform: tuya
    name: "Alarm Volume"
    number_datapoint: 116
    icon: "mdi:volume-high"
    min_value: 0
    max_value: 2
    step: 1

sensor:
  - platform: tuya
    name: "Power Status"
    sensor_datapoint: 101
    icon: "mdi:power-plug"

  - platform: tuya
    name: "Temperature"
    sensor_datapoint: 105
    unit_of_measurement: "°C"
    accuracy_decimals: 1
    filters:
      - multiply: 0.1
    icon: "mdi:thermometer"

  - platform: tuya
    name: "Humidity"
    sensor_datapoint: 106
    unit_of_measurement: "%"
    accuracy_decimals: 0
    icon: "mdi:water-percent"
Got lucky with this device as it uses the well-defined non locked down chip. If you see any old IoT devices in the market, do some research and see if they can be liberated the same way!
Edit: Quite Embarrassed but there is already a template on devices.esphome.io which for some reason I did not stumble upon while doing this. That seems to have some additional features, so do check it out.
Thanks to templates.blakadder.com for the Tasmota template which was used to adapt this. ↩︎